Sewing patterns are available HERE
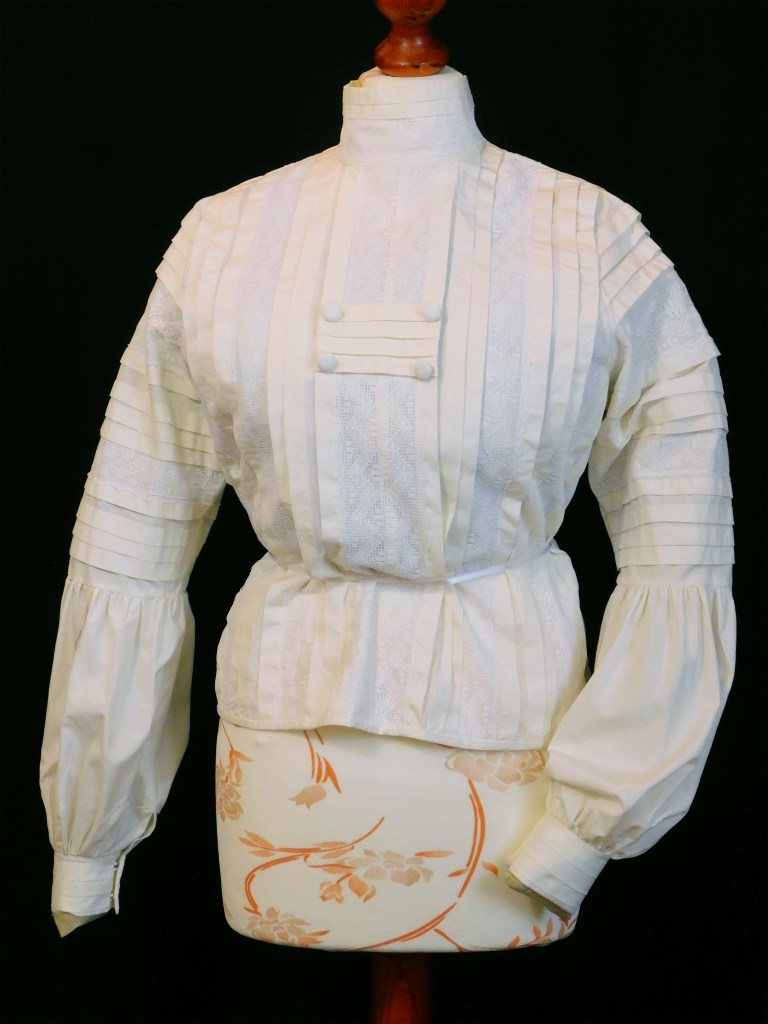
While I finish the sewing patterns for the S-Bend corset, which will be soon available, I’m sharing with you the tucked shirt I’ve done for the Edwardian ensemble I did this summer.
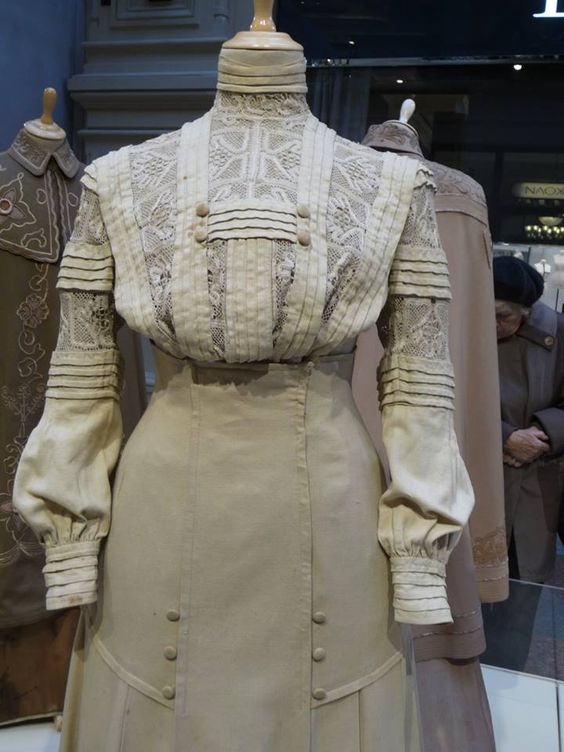
This shirt was the trickiest every done, it took me a lot just to figure out how it should have been done since I just had one single image as reference:
Not easy at all but I did some mockups and the patterns were ready.
As said on the previous post I’m very sorry I don’t have so much photos to share (most of them are on my Instagram account btw)
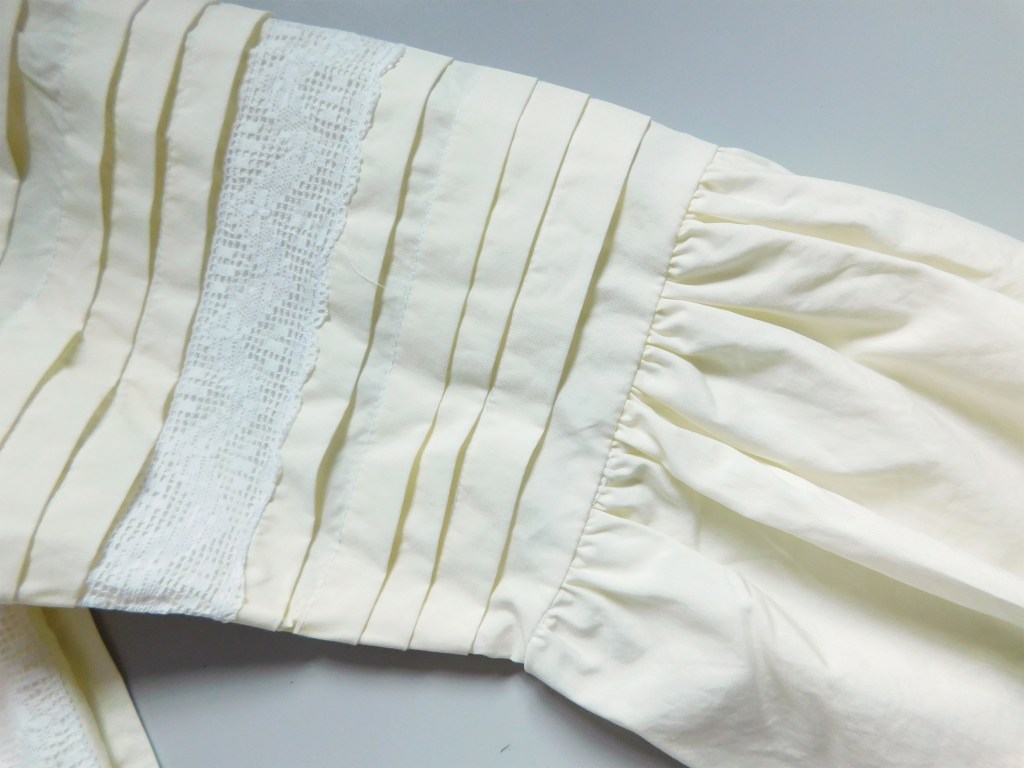
First of all, the tucks were measured on the lace trim width, so I had to be extremely precise or the whole garment would have been too much large or short. It was a nightmare since I had the very bad idea to wash the lace once all the measures were done and I found it reduced by 1,5 cm (0.59 inch)!
I had to make another tuck just under the lace to fix this problem.
I used a vintage lace, 100% cotton, so it is understandable.

Once the sleeves were ready I attached them to the armholes and I finish them with bias tape. Obviously I had to make the inside as neat as possible.

This is why I joined each piece with french seams.
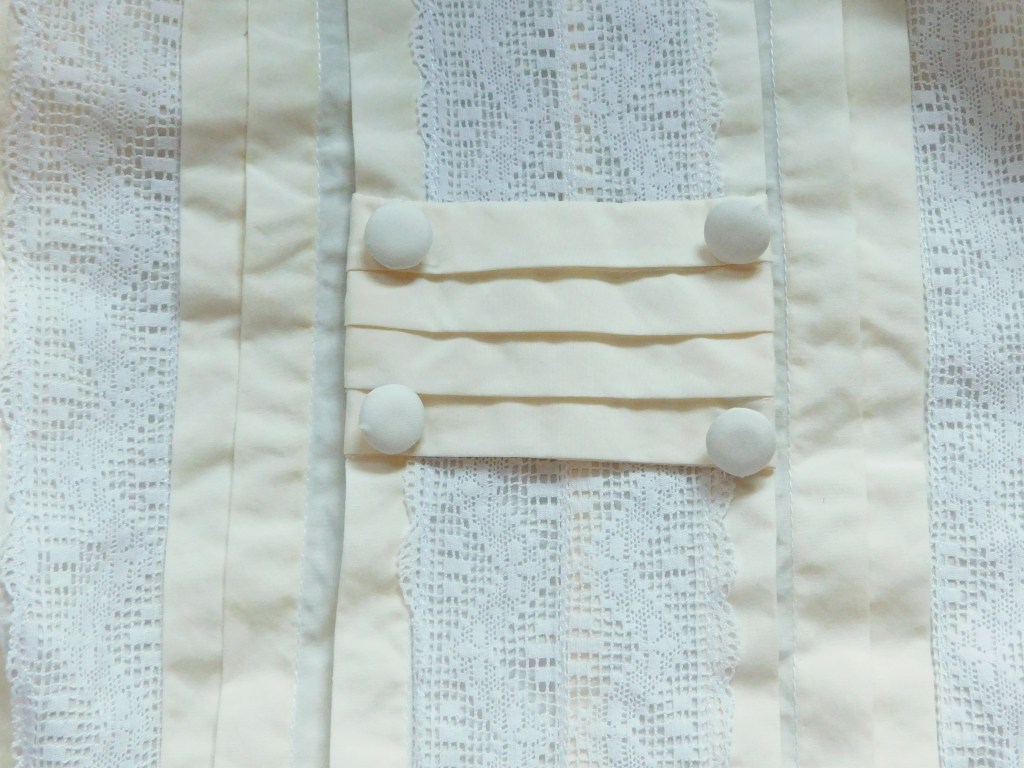
As regards the center front tucks, I applied the finished piece onto the wrong side of the center tucks.
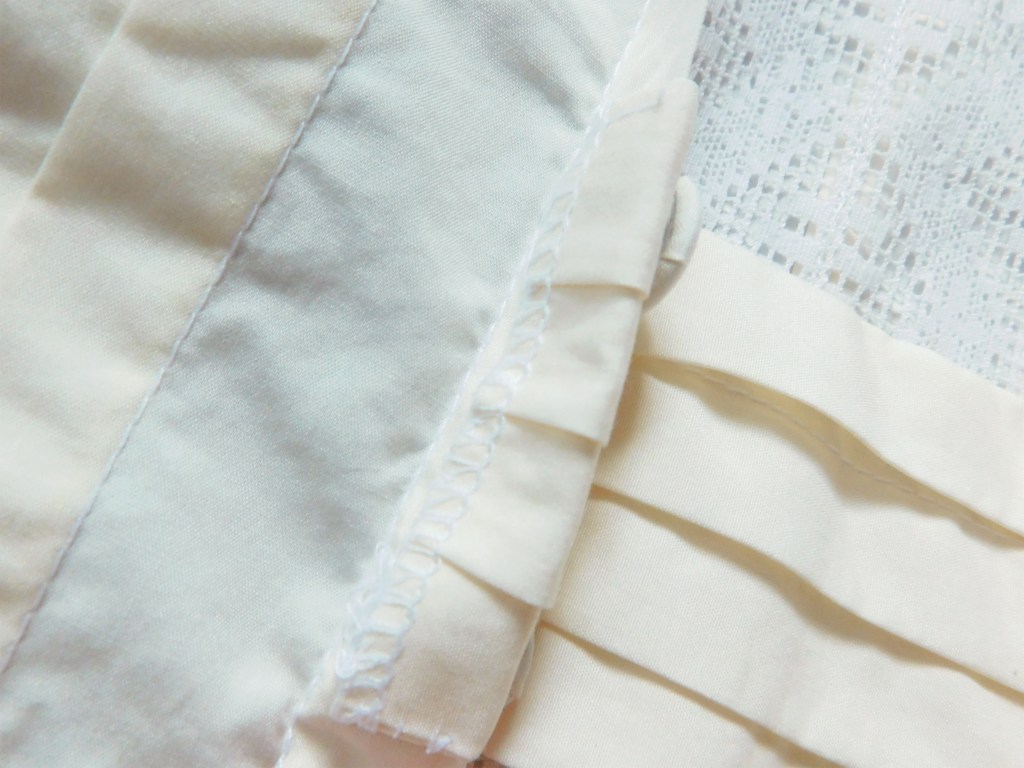
I stitch the raw edges with tiny stitches and I applied 4 covered buttons I made with the same fabric.

I also matched the tucks on the shoulders and this was another time consuming part. It take a while but I managed them. The shirt may seems perfect but it’s not.
Since the corset cover was done for another type of dress (I’ll tell you more once I’ll start it, probably this winter) the lightblue color was too much visible under the white shirt. I had to use a thick cotton and this took me away the same amount of cm my corset “eat” from my waistline. I was furious, but hey…it’s experience.
So probably I’m gonna do another version with lighter fabric and a white corset cover.
However this is the finished shirt.
